

clutch cable replacement: technical guide
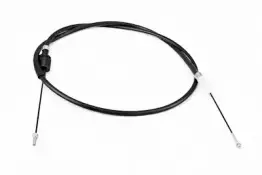 The heart and foundation of a manual transmission vehicle is a flawlessly functioning clutch system. It gives the driver complete control over the engine's torque and the car's movement. Although many newer vehicles are equipped with hydraulic clutches, there are still a large number of cars on the road where the connection between the pedal and the gearbox is kept alive by a mechanical clutch cable. It is a simple component, but one that works under enormous stress and will inevitably fatigue, wear out or break at some point.
Replacing a clutch cable is not just about replacing a broken part – it requires understanding how the system works, diagnostic skills and specific knowledge of the specifics of car models. In this highly detailed and technically oriented guide, we will examine every aspect of replacing a clutch cable. We will talk about the symptoms that betray an impending break, review the most common car models’ notorious faults, dissect the inner workings of automatically adjusting cables and provide step-by-step instructions for installing a new cable. We will also talk about why a new cable can sometimes break again within a few weeks and which spare parts manufacturers are worth trusting when repairing your car.

1. How do you know that the clutch cable needs to be replaced immediately?
No clutch cable will ever break completely without warning. Cable wear is a gradual process that signals the driver through a number of physical symptoms. Recognizing these symptoms early can save you from a situation where your car suddenly becomes immobile at an intersection.
heavy and "stiff" clutch pedal
This is the most common symptom. The clutch cable consists of an inner braided steel wire and an outer sheath, often with a Teflon (PTFE) sliding layer inside. Over the years and hundreds of thousands of presses, the Teflon layer wears away. Moisture and dust can get inside the cable sheath, causing corrosion. The result is enormous internal friction. Depressing the pedal requires an unnaturally high force and it can move in steps, as if "jumping". This makes smooth disengagement almost impossible and gives the driver the feeling that he can no longer slide the clutch.
creaking or scraping sound when pressing the pedal
When you press the clutch and hear a metallic creak, the inner steel strands of the cable have begun to break. The broken strands will branch out (reminiscent of a bird’s nest) and scrape against the outer sheath of the cable. This is a critical danger sign – the cable has lost its structural integrity and could snap completely at any moment.
difficult gear shifting and rattling
If the clutch cable has stretched out or its outer casing has collapsed due to heat and stress in the engine compartment, pressing the pedal can no longer push the clutch fork far enough. The clutch does not fully disengage the engine and transmission. As a result, first gear and especially reverse (since it lacks synchronizers) are extremely difficult to engage - the gear lever is numb and the gear change is accompanied by an ugly rattling of the gears.
the clutch pedal sinks to the bottom and does not come up
This is the final act. If the pedal suddenly falls to the floor with a clank, the steel core of the cable has broken or – very common with automatically adjusting cables – the plastic tensioning mechanism of the cable has broken. The car can no longer move because it is not possible to engage the gears with the engine running.
2. Manually adjustable vs. automatically adjustable clutch cable
Before starting any replacement work or ordering a replacement part, it is essential to know which type of system your car uses. The installation procedures for these two technologies are radically different.
manual rope
A classic and bombproof solution. There is a long threaded rod at the gearbox end of the cable. This rod has an adjustment nut and a lock nut. If the clutch disc wears out, the nut must be manually tightened with a wrench to restore the pedal's free play. The advantages of this system are reliability (there are no breakable plastic parts) and the ability to set the clutch engagement point exactly according to the driver's preferences (whether the clutch engages from below or above). Installation is simple and logical.
self-adjusting cable
an attempt by engineers to make the car maintenance-free. a large plastic cylinder is built between the cable casing (usually near the firewall). inside it is a complex ratchet mechanism and a strong spring. as the clutch disc wears and the cable tension changes, the plastic gear automatically jumps forward one tooth, always keeping the cable under ideal tension and the pedal grip point unchanged.
The disadvantage of this system is reliability. Constant tension, engine compartment heat and winter frost make the plastic brittle. The teeth wear out and the mechanism gives way – the cable "gives" and the pedal falls to the bottom, although the steel cable itself is intact. **Attention when installing:** Automatic cables are delivered from the factory with a special plastic transport retainer that keeps the mechanism compressed. This retainer must not be removed or broken until the cable is securely fastened at both ends (on the pedal and gearbox). If you remove the retainer earlier, the cable will pop out to its full length and it will be almost impossible to compress it back.
3. most common car models and typical faults in their clutch cables
Over the decades, certain models have developed where replacing the clutch cable is a routine daily task for mechanics. Certain engineering choices have created specific common faults.
peugeot and citroën (psa group)
Models such as the Peugeot 206, 306, 307, 406 and Citroën Berlingo, Partner are notorious for clutch cable breakage. PSA almost exclusively used automatically adjusting cables. The clutch baskets on these cars become very stiff with age, requiring a lot of force when pressing the pedal. The plastic tensioner of the automatic cable cannot withstand this force and breaks with a bang. Another common common fault is the small white plastic retaining hook on the clutch pedal itself. The heavy cable will break this hook off the pedal.
Mechanic tip: many workshops refuse to install a new automatic cable on PSA cars and install a specially designed aftermarket manually adjustable cable . This makes the system foolproof and unbreakable.
volkswagen, seat and škoda (vag group)
Older models (golf mk3, passat b3/b4, seat ibiza) used cables. vag's automatic cable has a large rubber "mushroom" shaped buffer at the gearbox end. over the years this rubber collapses due to engine heat and oil leaks. the clutch no longer disengages fully and the gears start to rattle. another problem area is the firewall feedthrough - the rubber seal breaks and the cable's outer sheath sinks through the firewall towards the cabin, making the pedal travel too short. here too, conscious owners prefer to switch to a manual cable.
renault (clio, kangoo, megane)
Renault problems often lie not in the cable itself, but in its consequences. Renault cables make several sharp turns in the engine compartment, which causes enormous internal friction when worn. The pedal becomes rock hard. If the driver continues to drive such a car, the aluminum or plastic pedal box located under the dashboard of the car will eventually give way. It will crack and break, leading to an extremely expensive and labor-intensive repair. If the Renault clutch becomes heavy, the cable must be replaced immediately.
honda (civic, accord - 90s models)
Honda's mechanical clutches are legendary in their durability. They used manual cables exclusively. Their cables rarely break, but they tend to stretch over the years, lowering the clutch engagement point considerably. Adjustment is made ingeniously simple – there's a large plastic wheel by the gearbox that can be turned freely by hand, making cable tensioning a minute's maintenance.
ford (focus mk1, fiesta)
In Fords, the problem is often the cable's thermal insulation. The cable often runs close to the hot exhaust manifold. The heat dries out the inner Teflon layer and lubricant in the cable. The pedal starts to move in stages, creaking and making smooth release very uncomfortable.
4. Necessary tools and preparation
Replacing the clutch cable generally does not require computer diagnostics or expensive special tools, but it does require physical flexibility and patience, as much of the work takes place inside the car, under the pedals, in cramped conditions.
- wrench set: usually open-end and ring wrenches in sizes 10mm, 13mm, 15mm and 17mm (for adjusting nuts and clamps).
- pliers or pliers: for holding the end of the rope or removing old clamps.
- Flashlight or headlamp: It's always dark under the dashboard near the pedals. Good lighting is critical.
- Lubricant: high-quality silicone grease or white lithium grease (to lubricate the pedal joints and the firewall rubber seal for easier installation).
- Screwdrivers and plastic pry bars: for removing the plastic interior covers and fuse box doors to provide access to the pedal frame.
5. clutch cable replacement step by step
The following guide is a universal overview that covers the main steps of replacing a cable. Specific fixings may vary by car brand.
Step 1: Preparation and clearance of the engine compartment
Open the hood. Identify where the clutch cable is located. It is a long, thick cable that comes from the firewall (inside the cabin wall) and runs to the clutch fork on top of the transmission. Many modern cars have very tightly packed engine bays. Often the air filter housing, air intakes, and sometimes even the battery with the battery tray must be removed to create space. This will make removing the cable much easier later.
step 2: removing the old cable from the gearbox
Find the point where the cable attaches to the clutch fork. If it is a manual cable, loosen the adjustment nuts (usually with a 10mm or 13mm wrench) and pull the end of the cable through the hole in the fork. If it is an automatic cable, you will need to push the fork (lever) slightly towards the gearbox with a large lever or pipe wrench to loosen the cable, then remove the loop or rubber buffer at the end of the cable from the fork.
step 3: cabin acrobatics – releasing the rope from the pedal
This is the most difficult and uncomfortable part of the job. Move into the driver's seat of the car. Remove the plastic covers under the steering wheel and the knee pads so you can clearly see the top of the clutch pedal. Get under the pedals on your back. Use a strong headlamp.
There is a cable attachment at the top of the clutch pedal. This can be a simple steel hook (VW, Ford), a white plastic clip that needs to be pushed apart with a screwdriver (Peugeot, Citroën), or a loop running on a roller. Lift the clutch pedal as high as possible with your hand, push the cable in towards the cabin and unhook the end of the cable from the pedal.
step 4: pulling out the old rope
The cable passes through the car's firewall. There is a thick rubber seal at the point of the passage. Pull the old cable out from under the hood towards the engine compartment. If necessary, use a flat screwdriver to help push the rubber grommet out of the hole in the firewall. Carefully follow the trajectory of the old cable - which pipes it runs under or over. The new cable must go exactly the same way, to avoid hot exhaust parts and sharp corners.
step 5: installing and securing the new rope
Lightly lubricate the rubber seal on the new cable's firewall with silicone oil - this will help the seal fit more easily into its seat. Push the pedal-side end of the new cable through the firewall into the cabin.
Go into the cabin and hook the cable securely to the clutch pedal. This step often requires dexterity of the fingers. Make sure the cable sits straight in the groove of the pedal and is not twisted.
Move back under the hood. Make sure the rubber grommet in the firewall is properly and tightly seated in its slot – otherwise engine noise and rainwater will enter the cabin. Route the cable to the gearbox, following the factory trajectory. Use the factory clamps to prevent the cable from hanging loose in the engine compartment.
step 6: attaching the cable to the gearbox and adjusting
attach the end of the cable to the clutch fork.
If you are installing a manual cable: turn the adjusting nut until the cable is slightly taut. Go to the shop and try the pedal. In an ideal setting, the pedal should have about 15-25 mm of free play (freewheel) before you feel strong resistance (the clutch basket springs engaging). If there is no free play, the clutch will start to slip and burn out quickly. If the free play is too great, the clutch will not fully disengage and the gears will rattle. Adjust the nut until you reach the ideal point, then lock the system with the locknut.
If you are installing an automatically adjustable cable: the cable casing still has a factory plastic transport retainer (strap or clip) that holds the mechanism in place. Make sure again that the cable is securely in place at both ends (on the pedal and the fork). Now, and only now, break or pull off the removable retainer. You will hear a click or snap – the automatic tensioner is released and pulls the cable to the ideal tension. Press the clutch pedal all the way down in the cabin a few times to let the mechanism find its place. The job is done.
6. Important technical warning: Did the new cable break again?
This is a situation that infuriates car owners and forces them to accuse the parts dealer of selling a "defective part". You replaced the clutch cable, but after a month or a few thousand kilometers, the new cable has broken in half again or its automatic tensioner has broken again.
The reason lies in physics. A healthy and properly functioning clutch cable will not break on its own. If the cable breaks repeatedly, the clutch basket (pressure plate) inside your car's transmission is at the end of its life. A worn clutch disc causes the diaphragm springs in the clutch basket to change their angle. The springs also overheat over the years and lose their elasticity. The result is that it takes double or even triple the physical force to disengage the clutch compared to a new clutch.
A new cable can only withstand this enormous tension for a short time, until its internal steel fibers give way or the plastic parts break. If you install a new cable and the pedal still feels unnaturally heavy (as if you were pushing your foot against a wall), don't expect the cable to break again. The only permanent solution is to remove the transmission and replace the complete clutch assembly (disc, basket, release bearing). With a new clutch assembly, the pedal will become feather-light and the new cable will last the life of the car.
7. Can a new clutch cable be oiled?
short answer: absolutely not with modern ropes!
Mechanics often have the habit of lubricating everything with WD-40 or motor oil to keep things slippery. Modern quality clutch cables are lined with Teflon (PTFE) on the inside. Teflon is self-lubricating and offers one of the lowest coefficients of friction in the world. If you put liquid grease, spray oil or solvents inside a Teflon-lined cable, the Teflon reacts chemically with them. The Teflon layer swells, turns into a rubbery glue and the cable gets permanently stuck in its groove. New cables are always installed completely dry, exactly as they come out of the box.
8. best-known and most reliable spare parts brands
The clutch cable is a component where buying the cheapest unknown aftermarket part often pays off badly. Cheap cables stretch quickly, their plastic parts cannot withstand cold, and the automatic adjustment mechanisms stop working after just a few months.
Always prefer well-known European manufacturers who have strict quality control and who also produce parts directly for car factories (OEM quality):
- Sachs and Luk: two of the world's largest manufacturers of clutch components. Their branded clutch cables are of the absolute highest quality, offering the ideal length and durability, designed to work in harmony with their own clutch kits.
- ate and trw: both brands are premium manufacturers of brake and clutch systems. The teflon coating and external corrosion protection of their cables are among the best on the market.
- cofle: an italian company that specializes almost exclusively in the production of car cables (clutch, accelerator and handbrake cables). their selection is huge, covering even very old and rare car models, offering an excellent price-quality ratio.
- febi bilstein, abs and seim: well-known and reliable aftermarket manufacturers. febi bilstein in particular often offers these special "conversion kits" where the break-prone automatic cable is replaced with a foolproof manual cable (a great solution for vag and psa group cars).
summary
A car's clutch cable is a critical yet simple link that connects the driver's decisions to the car's mechanical power. A heavy, creaky or rattling system not only makes driving uncomfortable, it is a direct warning of impending failure. By knowing whether your car uses a manual or automatic cable, being aware of the typical faults specific to your make (such as a Peugeot or VW), and understanding the effect of clutch basket wear on the cable, you will be able to prevent and correctly diagnose problems.
Clutch cable replacement is a do-it-yourself (DIY) project that is completely within the reach of many car owners, requiring patience and flexibility rather than specialist knowledge. By investing in quality parts from reputable brands (such as Sachs, TRW or Cofle) and following the correct installation techniques – especially when it comes to automatic cable retainers – you can restore your car’s clutch system to smooth and enjoyable operation for years to come.
 The data shown here, especially the complete database of car spare parts, may not be copied. It is strictly prohibited to duplicate the data and database and distribute the same, and/or instruct third parties to engage in such activities, without prior consent from TecAlliance. Any use of content in a manner not expressly authorized constitutes copyright infringement and violators will be prosecuted.