

Honda Civic Brake Pad Replacement: A Complete Guide
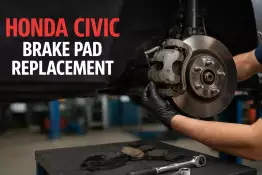
Honda Civic Brake Pad Replacement: A Comprehensive Guide for the DIY Mechanic
The Honda Civic is renowned for its reliability, fuel efficiency, and dynamic driving experience. It’s a car that serves its owner faithfully for years when properly maintained. One of the most critical maintenance tasks directly impacting your safety and the safety of others on the road is the upkeep of your braking system. Brake pads are a wearable component of this system that require regular inspection and timely replacement.
While many car owners prefer leaving brake-related work to professionals, changing brake pads on a Honda Civic is actually a manageable task for even a beginner home mechanic. It simply requires the right tools, some patience, and thorough preparation. This article is designed to guide you step-by-step through the entire process, from diagnosis to breaking in the new pads.
Replacing the brake pads yourself saves a significant amount of money that would otherwise go towards workshop services. Additionally, it gives you a better understanding of your car's technical condition and the peace of mind that the job has been done correctly. In this guide, we'll focus on the most common Honda Civic generations, but the fundamental principles are similar for most cars with disc brakes.

Why is Brake Pad Replacement Important?
Brake pads work on the principle of friction. When you press the brake pedal, the brake caliper squeezes the brake pads against the rotating brake disc (rotor). This creates friction, converting the car's kinetic energy into heat energy and slowing down or stopping the vehicle. With every braking action, a small amount of the brake pad's friction material wears away.
If the friction material wears too thin, braking efficiency drops dramatically. This means longer stopping distances, which can be decisive in critical situations. Worse, if the pads wear down completely, the metal backing plate of the pad starts grinding against the brake disc. This not only reduces braking force to nearly zero but also ruins the brake disc, making the repair much more expensive.
Regular brake pad replacement is therefore an investment in safety and prevents larger expenditures in the future. It ensures that your Honda Civic always brakes effectively and reliably, regardless of road conditions or weather.
When to Replace Honda Civic Brake Pads?
There is no single rule for how many miles brake pads last. It depends on many factors: your driving style (aggressive vs. smooth braking), driving environment (city traffic vs. highway), car load, and pad quality. However, there are several signs indicating that it's time to check and likely replace the brake pads.
Warning Signs to Look Out For:
- Squealing or scraping sound when braking: This is the most common sign. Many modern brake pads have a small metal wear sensor that starts grinding against the disc and producing a sharp sound when the pad is worn to a certain point. If you hear metal-on-metal grinding, the pads are likely completely gone, and you must act immediately.
- Brake pedal vibration: If you feel vibration when pressing the brake pedal, it might indicate warped brake discs. This often happens when worn pads have unevenly heated or damaged the disc. In such cases, both the pads and discs need replacement.
- Car pulls to one side when braking: This could indicate that the brake pads on one wheel are more worn or that the brake caliper is stuck. This is a serious warning sign requiring prompt intervention.
- Brake pedal feels "soft" or sinks too deep: This could indicate air in the braking system, a brake fluid leak, or extremely worn pads. Immediately check the brake fluid level and look for leaks.
- Brake warning light on the dashboard: Some Honda Civic models have electronic wear sensors that illuminate a warning light when pads need replacement. Do not ignore this light.
- Visual inspection: The surest way is to visually check the thickness of the pads. With many alloy wheels, the brake caliper and pads are visible without removing the wheel. If the friction material thickness is under 1/8 inch (3 mm), it's time to plan a replacement. New pads are typically around 3/8 to 1/2 inch (10-12 mm) thick.
Necessary Tools and Preparation
Before starting work, make sure you have all the necessary tools and supplies. Proper preparation makes the job smoother and safer.
Tool List:
- Lug wrench: For loosening and tightening wheel nuts.
- Jack: For lifting the car. Always use the designated lifting points specified by the manufacturer.
- Jack stands: For ensuring safety. Never work under a car supported only by a jack.
- Socket wrench set: For loosening brake caliper bolts. For a Honda Civic, you typically need 12 mm and 14 mm sockets.
- Wrenches: For holding brake caliper sliders if the bolts are stuck.
- C-clamp or specialized brake caliper piston compression tool: For compressing the brake caliper piston. For rear brakes with an integrated parking brake, a special wind-back tool is required.
- Wire brush: For removing rust and grime from the brake caliper and pad seats.
- Rags and brake cleaner: For cleaning parts.
- High-temperature brake grease: For lubricating the backs, ears, and sliders of the pads. Do not use regular grease; it cannot withstand high temperatures.
- Torque wrench: For correctly tightening bolts and wheel nuts according to manufacturer specifications.
- Protective gloves and safety glasses: For personal safety. Brake dust is harmful.
- Brake fluid: Just in case the level needs topping up.
Preparatory Steps:
- Park the car on a level surface: Ensure the car cannot roll.
- Engage the parking brake (handbrake): This is especially important when working on the front brakes. If working on the rear brakes, block the front wheels with wheel chocks.
- Loosen the wheel nuts: Do this while the car is still on the ground. Do not loosen them completely, only by half a turn.
- Lift the car: Use the jack to lift one corner of the car. Place a jack stand securely under the frame or subframe.
- Remove the wheel: Unscrew the nuts completely and remove the wheel. Place it in a safe location, such as under the car near the jack stand for added safety.
- Open the brake fluid reservoir cap: Located under the hood. This eases compressing the brake piston. You can wrap a rag around the reservoir to prevent fluid overflow onto painted surfaces (brake fluid is corrosive).
How to Choose the Right Brake Pads?
The brake pad market is huge, and the choices can be overwhelming. It's crucial to select pads that precisely fit your Honda Civic model, year, and engine type. The best way to find the correct parts is to use a reliable auto parts search engine or consult a parts specialist.
Brake Pad Materials:
- Organic (Non-Asbestos Organic - NAO): Made from fibers, resins, and fillers. They are soft, quiet, and inexpensive but wear faster and produce more dust. Suitable for gentle city driving.
- Semi-Metallic: Contain 30-65% metal (steel, copper, iron) mixed with organic materials. They are more durable, handle heat better, and provide better braking power, but are noisier, wear brake discs more, and create lots of black dust. Suitable for daily use and tougher conditions.
- Ceramic: Made from ceramic fibers, fillers, and a small amount of metal. They are the most expensive but offer the best balance: quiet, produce little light-colored dust, are very durable, and handle heat well. Provide stable braking force over a wide temperature range. An ideal choice for most modern cars, including the Honda Civic.
For daily driving in a Honda Civic, ceramic pads are usually the best investment due to their comfort, cleanliness, and longevity. However, if you are looking for maximum braking power for track days, semi-metallic pads might be more appropriate.
Step-by-Step Guide to Replacing Front Brake Pads
Replacing front brakes is typically easier because the brake caliper piston can be directly compressed.
1. Brake Caliper Removal:
- Locate the bolts on the back of the brake caliper. Usually, there are two (upper and lower) attaching to the sliders.
- Unscrew the lower bolt. On some models, both bolts need to be removed, while on others, unscrewing just the lower one is enough to swivel the caliper up.
- Once the bolt is removed, swivel the brake caliper up and remove it from over the brake pads.
- IMPORTANT: Do not let the brake caliper hang by the brake hose. This can damage the hose. Suspend the caliper using wire or an "S"-hook from the strut spring or another secure component.
2. Removing Old Pads and Hardware:
- Remove the old brake pads from the caliper bracket. Note how they are installed and where the wear sensors are located.
- Remove the old metal clips (shims) holding the pads in place. They are usually rusty and dirty. New pad kits often include new clips.
- Use a wire brush and brake cleaner to thoroughly clean the caliper bracket and pad seats of rust and grime. A clean surface ensures free movement of the pads.
3. Compressing the Brake Caliper Piston:
- Since the new brake pads are thicker, you need to compress the brake caliper piston back into the caliper housing to fit the new pads.
- Place an old brake pad in front of the piston to protect it from damage.
- Use a C-clamp or brake caliper piston compression tool and slowly and evenly compress the piston all the way back. Monitor the brake fluid reservoir under the hood to prevent overflow. If necessary, remove some fluid with a syringe.
4. Installing New Pads:
- Install the new metal clips into the cleaned seats. Ensure they are securely seated.
- Apply a small amount of high-temperature brake grease to the back of the new pads (where the piston and caliper body make contact) and to the pad ears that slide within the clips. AVOID GETTING GREASE ON THE FRICTION SURFACE OR THE BRAKE DISC.
- Install the new brake pads into the bracket. Ensure the pad with the wear sensor (if present) goes on the correct side (usually the inner pad). The pads should fit easily into the seats and move freely.
5. Brake Caliper Reinstallation:
- Take the brake caliper down from hanging and place it over the new pads.
- Before securing the bolts, check the brake caliper sliders. They should move freely. If stuck, remove, clean, and lubricate them with specialized slider grease.
- Screw the brake caliper bolts in by hand and then tighten them with a torque wrench according to Honda Civic specifications (typically around 25-35 Nm or 18-26 ft-lb). Do not overtighten.
Step-by-Step Guide to Replacing Rear Brake Pads
Replacing rear brakes is more complex because the Honda Civic uses a system for the parking brake that requires winding the piston back, not simply compressing it.
1. Parking Brake Release:
- Ensure the parking brake is fully released. Block the front wheels with wheel chocks.
- Steps are similar to front brakes: lift the car, remove the wheel, open the brake fluid reservoir.
2. Brake Caliper Removal:
- Unscrew the brake caliper bolts.
- Remove the caliper and suspend it securely.
3. Removing Old Pads and Hardware:
- Remove old pads and clips.
- Thoroughly clean the caliper bracket and seats.
4. Winding Back the Brake Caliper Piston:
- This is the most critical difference. The rear brake caliper piston typically has a cross-shaped recess.
- You cannot compress this piston with a C-clamp. Attempting to do so will ruin the parking brake mechanism.
- Use a specialized brake piston wind-back tool (often referred to as a "cube" or kit). Select the appropriate adapter that fits into the piston recess.
- Using the tool, slowly turn the piston clockwise while applying light pressure until the piston is fully retracted into the caliper housing. Monitor the brake fluid level.
- Ensure the piston recesses are left in a position compatible with the pin on the back of the new brake pad (if present).
5. Installing New Pads:
- Install new clips.
- Lubricate the back and ears of the new pads with brake grease.
- Install new pads. Ensure the pin on the back of the inner pad (if present) sits precisely in the piston recess. This is important for the correct operation of the parking brake.
6. Brake Caliper Reinstallation:
- Place the caliper over the new pads.
- Check and lubricate sliders.
- Secure bolts and tighten with a torque wrench according to specifications.
Finishing Up and Final Checks
After installing new pads on both sides, it's important to perform final checks and break-in.
- Close the brake fluid reservoir cap: Check the fluid level. It should be between the MAX and MIN marks. If there's too much fluid, remove the excess.
- Pump the brake pedal: Before starting the car and moving, pump the brake pedal several times until it becomes firm. This extends the brake pistons and brings the pads against the disc.
- Check the parking brake: Engage the parking brake and ensure it holds the car in place.
- Reinstall wheels: Lower the car off the jack stands, install the wheels, and tighten the lug nuts with a torque wrench in a cross pattern (typically 100-110 Nm or 80-100 ft-lb for a Honda Civic).
- Take a test drive: Choose a quiet street or parking lot. Move slowly and test the brakes. The pedal might feel a bit soft initially until the pads "seat" into place. Listen for unusual sounds.
Breaking In New Brake Pads
New brake pads require a break-in period (bedding-in) to achieve maximum efficiency and harmonize the pad surface with the brake disc.
- Avoid sudden and hard braking for the first 200-300 miles if possible. This prevents the pads from overheating and "glazing."
- Perform a series of moderate brakings from 40 mph down to 15 mph, allowing the brakes to cool in between. This helps transfer friction material evenly to the brake disc.
- After breaking in, the brakes should operate quietly, smoothly, and effectively.
Safety First!
Brake repair is serious work. If you have any doubts or uncertainties during the process, stop and seek assistance from a qualified mechanic. This guide is informational in nature, and the author is not responsible for errors or damages that may occur from following it.
 The data shown here, especially the complete database of car spare parts, may not be copied. It is strictly prohibited to duplicate the data and database and distribute the same, and/or instruct third parties to engage in such activities, without prior consent from TecAlliance. Any use of content in a manner not expressly authorized constitutes copyright infringement and violators will be prosecuted.