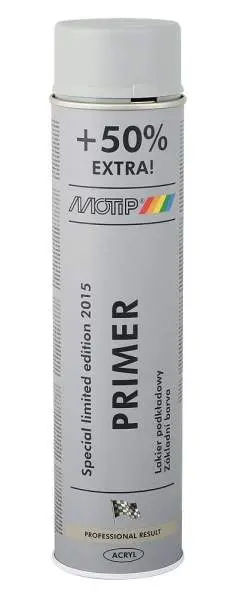
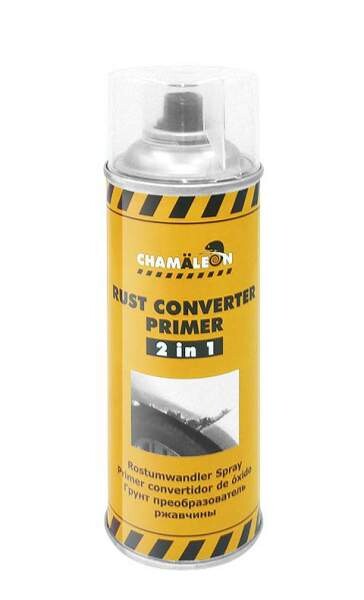
Happekruntvärv 400ml aerosol


1K Happekrunt on With excellent nakkumisomadustega,
it especially puhtal grinded metal for example. autoosad, metallplaadid.
Aktiivsed rust protection pigmendid ensure optimal protection against corrosion.
fast drying. may also to use welding õmblusi katva krundina.
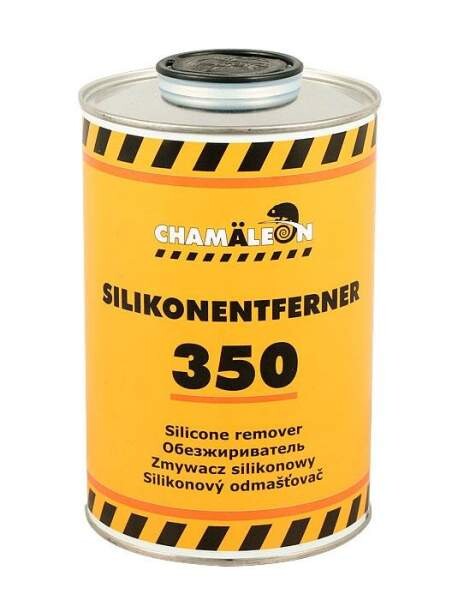
best result . use before priming silicone eemaldajat.
Suitable aluspind: grinded metal, hardened paint, Primed surfaces, Polyester
alusmaterjalid, aluminium. color: red brown.
coverage: 400ml 1m².
Chamäleon
German manufacturer of high-quality putty products. the chameleon mark was first introduced in 1965 in schwerte.at that time chamäleon putty products were mainly produced for the German speaking market and represented the highest quality that professional users could count on. In 2002, it was decided to expand the range of putty products and start focusing on the international market. to realize this, the chamäleon brand was commissioned into a separate company under qualified management.

all putty products were still made in schwerte so that the company could move to foreign markets with excellent "made in germany" quality products. heidelberg, located in the rhine-neckar triangle, was chosen as the headquarters of the new company because of its infrastructure and ideal conditions for new expansion strategies.
chamäleon gmbh was able to successfully implement the set goals and was able to establish itself internationally with a wide range of car finishing products. the key to the success of the young company is to offer "made in Germany" quality products at very competitive prices and to offer the highest level of customer service. chamäleon gmbh works according to international quality standards, including the well-known iso 9001: 2015. the company received the strain thüringen certificate, which is proof of its continued commitment to quality and customer satisfaction.
EAN: 4260099828060
Delivery method
The product delivery is not available to your selected destination.


$21.70
Arrives in 4-5work days


$7.40
$7.80
-6%
Arrives in 3-4work days




$8.90
$9.90
-11%
Arrives in 3-4work days



Car paint thickness gauge and car paint layers
 A paint thickness gauge (or paint depth gauge) is used to measure the thickness of a vehicle's paint layer to determine whether the car has received a new paint coating after leaving the factory (either due to a previous accident, paint damage, etc.) or not. ). The repainted body part gives a higher reading than the part wearing the original paint.
... More...
A paint thickness gauge (or paint depth gauge) is used to measure the thickness of a vehicle's paint layer to determine whether the car has received a new paint coating after leaving the factory (either due to a previous accident, paint damage, etc.) or not. ). The repainted body part gives a higher reading than the part wearing the original paint.
... More...
RAL color chart
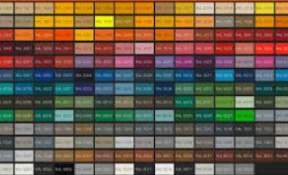 RAL is a European color matching system that defines the colors of paint, coatings, and plastics. The RAL color standard is maintained by the RAL Deutsches Institut für Gütesicherung und Kennzeichnung. “RAL” is an abbreviation for “Reichs-Ausschuß für Lieferbedingungen und Gütesicherung”.
... More...
RAL is a European color matching system that defines the colors of paint, coatings, and plastics. The RAL color standard is maintained by the RAL Deutsches Institut für Gütesicherung und Kennzeichnung. “RAL” is an abbreviation for “Reichs-Ausschuß für Lieferbedingungen und Gütesicherung”.
... More...
Information about painting and colors
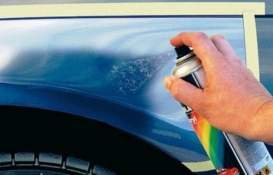 General information and frequently asked questions about painting and spray paints. The article contains information about Motip-Duplicolor products, information about products from other brands may differ from the information provided here depending on the specifics of the product.
... More...
General information and frequently asked questions about painting and spray paints. The article contains information about Motip-Duplicolor products, information about products from other brands may differ from the information provided here depending on the specifics of the product.
... More...
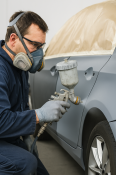
How to do minor paint repairs on a car yourself
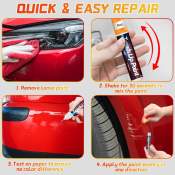 Every car owner knows the feeling: you're washing your car and suddenly notice a new scratch on the door or a stone chip on the hood. It's a frustrating moment that often ruins the mood. These small blemishes are not only aesthetically unsightly, but over time they can develop into more serious problems, such as rust that spreads under the paint and irreparably damages the body panels. The first thought is often to turn to a professional paint shop. While this will ensure a top-notch result, repainting even a small detail can cost hundreds of euros. Fortunately, many minor damages – superficial scratches, scuff marks and small stone chips – can be repaired at home with a little time, patience and the right tools. This guide is designed to give you the knowledge and confidence to do your own car paint repair. We're not talking about repainting an entire car or a large dent from an accident, but rather those everyday "battle scars" that can be successfully hidden in a garage or backyard. A properly performed repair will not only improve the appearance of your car, but also protect it from the elements and maintain the value of the vehicle. Chapter 1: Anatomy of Car Paint – Understanding What You’re Doing Before you grab the sandpaper or the paint bottle, it's critically important to understand how a modern car's paint job is structured. It's not just one layer of paint on metal. Most modern cars are finished with a multi-layer system called a "basecoat/clearcoat" system, although in reality there are more layers. Understanding which layer the damage is located in completely determines the repair method. 1. substrate: this is the material of the car body – usually sheet steel, aluminum or plastic (for example, on the bumpers). 2. primer: the first coat applied directly to the substrate. The purpose of the primer is to protect the metal from corrosion and ensure strong adhesion of subsequent paint layers. The primer is often gray, white, or black. 3. Basecoat: This is the layer that gives the car its actual color and effect (such as metallic or pearlescent). The basecoat layer is surprisingly thin and, without protection, is very susceptible to environmental influences. It is important to know that basecoat is usually matte until it is covered with varnish. 4. Clearcoat: The top, transparent layer. This is the car's "shield." Clearcoat adds depth and shine to the paint, but its main function is to protect the base paint from UV rays, scratches, acid rain, bird droppings, and other chemicals. Clearcoat is the thickest of the three, but still only about the thickness of a hair. Most everyday scratches are limited to the paint layer. These are the easiest to repair. Once the scratch has penetrated the paint and reached the base color, the repair is more difficult. However, if the damage has penetrated all layers and exposed the primer or even the bare metal, quick action is essential to prevent rust. Chapter 2: Damage Assessment – Can I Do It Myself? The most important step is diagnosis. A correct diagnosis saves time and money and prevents you from making things worse. "nail test" The easiest and most common way to assess the depth of a scratch is the so-called nail test. Carefully slide your fingernail across the scratch. Scenario A: The nail doesn't get stuck behind the scratch. If you can barely feel the scratch or not at all, it's a very superficial damage that's only on the top layer of paint. These scratches often appear as light or white lines on a dark car. The good news: they're easiest to remove by polishing. Painting is probably not necessary. Scenario B: The nail is noticeably stuck behind the scratch. This indicates that the scratch is deeper, likely going through a significant portion of the varnish layer. Solution: Depending on the depth, more aggressive polishing may be sufficient, but sanding (wet sanding) and subsequent polishing are often necessary. Scenario C: You see a different color at the bottom of the scratch. If the car is blue but the bottom of the scratch is white or gray, you have reached the primer stage. If you see shiny metal or even slightly brownish rust, it is more serious. Solution: Polishing will not help here. You need to fill the damage with new paint, or paint touch-up. This requires more skill and special tools. When to call a professional? If the damage is large (for example, the entire door is scratched with a key), if the metal is dented, or if the rust has already penetrated the paint and caused "bubbles", home repair is very difficult and the result may not be satisfactory. Also, spot repair of complex three-layer pearlescent paints is a very big challenge for a beginner. Chapter 3: The necessary arsenal – tools and materials You need the right tools to do a successful job. Don't try to replace specialty products with household chemicals. Here's a list of things you might want to stock up on, depending on the nature of the job: for cleaning and preparation: car shampoo and wash mitt . Silicone remover or isopropyl alcohol (IPA) – for degreasing surfaces. high-quality microfiber cloths (have several of them). Masking tape (high quality, does not leave adhesive marks). for superficial scratches (polishing): scratch remover or abrasive polishing compound. finishing paste (polish) to restore shine. polishing pad (for manual use) or polishing machine with appropriate discs . for deeper nicks and scratches (painting): Correct shade of paint: This is critical. Find the exact paint code from your car's VIN or body plate. Paint touch-up kits are often sold in small bottles with a brush inside the cap (like nail polish), or in aerosol cans. For precision work, a bottle is better. Primer (if necessary): if the metal is bare, a fine brush is suitable for applying it to the cracks. Clearcoat : If you use a two-coat system, you will definitely need a separate clearcoat to protect the base color and provide shine. very fine art brushes or toothpicks/matches: the brushes that come with the kit are often too big and cumbersome for small marks. Wet sandpaper : grits p1500, p2000, p2500 and p3000. These are used to smooth out the repair area. Sanding block : a small, hard block (such as the size of a school eraser) to sand only the raised area, not the surrounding entire varnish.
... More...
Every car owner knows the feeling: you're washing your car and suddenly notice a new scratch on the door or a stone chip on the hood. It's a frustrating moment that often ruins the mood. These small blemishes are not only aesthetically unsightly, but over time they can develop into more serious problems, such as rust that spreads under the paint and irreparably damages the body panels. The first thought is often to turn to a professional paint shop. While this will ensure a top-notch result, repainting even a small detail can cost hundreds of euros. Fortunately, many minor damages – superficial scratches, scuff marks and small stone chips – can be repaired at home with a little time, patience and the right tools. This guide is designed to give you the knowledge and confidence to do your own car paint repair. We're not talking about repainting an entire car or a large dent from an accident, but rather those everyday "battle scars" that can be successfully hidden in a garage or backyard. A properly performed repair will not only improve the appearance of your car, but also protect it from the elements and maintain the value of the vehicle. Chapter 1: Anatomy of Car Paint – Understanding What You’re Doing Before you grab the sandpaper or the paint bottle, it's critically important to understand how a modern car's paint job is structured. It's not just one layer of paint on metal. Most modern cars are finished with a multi-layer system called a "basecoat/clearcoat" system, although in reality there are more layers. Understanding which layer the damage is located in completely determines the repair method. 1. substrate: this is the material of the car body – usually sheet steel, aluminum or plastic (for example, on the bumpers). 2. primer: the first coat applied directly to the substrate. The purpose of the primer is to protect the metal from corrosion and ensure strong adhesion of subsequent paint layers. The primer is often gray, white, or black. 3. Basecoat: This is the layer that gives the car its actual color and effect (such as metallic or pearlescent). The basecoat layer is surprisingly thin and, without protection, is very susceptible to environmental influences. It is important to know that basecoat is usually matte until it is covered with varnish. 4. Clearcoat: The top, transparent layer. This is the car's "shield." Clearcoat adds depth and shine to the paint, but its main function is to protect the base paint from UV rays, scratches, acid rain, bird droppings, and other chemicals. Clearcoat is the thickest of the three, but still only about the thickness of a hair. Most everyday scratches are limited to the paint layer. These are the easiest to repair. Once the scratch has penetrated the paint and reached the base color, the repair is more difficult. However, if the damage has penetrated all layers and exposed the primer or even the bare metal, quick action is essential to prevent rust. Chapter 2: Damage Assessment – Can I Do It Myself? The most important step is diagnosis. A correct diagnosis saves time and money and prevents you from making things worse. "nail test" The easiest and most common way to assess the depth of a scratch is the so-called nail test. Carefully slide your fingernail across the scratch. Scenario A: The nail doesn't get stuck behind the scratch. If you can barely feel the scratch or not at all, it's a very superficial damage that's only on the top layer of paint. These scratches often appear as light or white lines on a dark car. The good news: they're easiest to remove by polishing. Painting is probably not necessary. Scenario B: The nail is noticeably stuck behind the scratch. This indicates that the scratch is deeper, likely going through a significant portion of the varnish layer. Solution: Depending on the depth, more aggressive polishing may be sufficient, but sanding (wet sanding) and subsequent polishing are often necessary. Scenario C: You see a different color at the bottom of the scratch. If the car is blue but the bottom of the scratch is white or gray, you have reached the primer stage. If you see shiny metal or even slightly brownish rust, it is more serious. Solution: Polishing will not help here. You need to fill the damage with new paint, or paint touch-up. This requires more skill and special tools. When to call a professional? If the damage is large (for example, the entire door is scratched with a key), if the metal is dented, or if the rust has already penetrated the paint and caused "bubbles", home repair is very difficult and the result may not be satisfactory. Also, spot repair of complex three-layer pearlescent paints is a very big challenge for a beginner. Chapter 3: The necessary arsenal – tools and materials You need the right tools to do a successful job. Don't try to replace specialty products with household chemicals. Here's a list of things you might want to stock up on, depending on the nature of the job: for cleaning and preparation: car shampoo and wash mitt . Silicone remover or isopropyl alcohol (IPA) – for degreasing surfaces. high-quality microfiber cloths (have several of them). Masking tape (high quality, does not leave adhesive marks). for superficial scratches (polishing): scratch remover or abrasive polishing compound. finishing paste (polish) to restore shine. polishing pad (for manual use) or polishing machine with appropriate discs . for deeper nicks and scratches (painting): Correct shade of paint: This is critical. Find the exact paint code from your car's VIN or body plate. Paint touch-up kits are often sold in small bottles with a brush inside the cap (like nail polish), or in aerosol cans. For precision work, a bottle is better. Primer (if necessary): if the metal is bare, a fine brush is suitable for applying it to the cracks. Clearcoat : If you use a two-coat system, you will definitely need a separate clearcoat to protect the base color and provide shine. very fine art brushes or toothpicks/matches: the brushes that come with the kit are often too big and cumbersome for small marks. Wet sandpaper : grits p1500, p2000, p2500 and p3000. These are used to smooth out the repair area. Sanding block : a small, hard block (such as the size of a school eraser) to sand only the raised area, not the surrounding entire varnish.
... More...
 The data shown here, especially the complete database of car spare parts, may not be copied. It is strictly prohibited to duplicate the data and database and distribute the same, and/or instruct third parties to engage in such activities, without prior consent from TecAlliance. Any use of content in a manner not expressly authorized constitutes copyright infringement and violators will be prosecuted.